 Welcome to the third installment of «making a bombproof reliable bike». Here I’m going to provide further tips on how to maintain your bike so that you can rely on it to get you through not just the best bike rides, but all of them. Don’t forget to read Part II: The Drivetrain and Part I: Wheels & Tyres.
1. Listen to your bike! Remember that a noise-free bike is what to aim for. If a bike clicks, ticks, creaks aqueaks and groans it’s trying to tell you something…. something like… «lube me!» or «I am badly in need of adjustment!». And it’s surely going to get worse and you increase the chances of component failure (for example breakage or seizure of parts).
2. If a part requires a special tool, pay attention to it! The worst bicycle failures are those which force a rider to stop and call for some kind of backup or a lift back home (either your partner, your parents, or you leg it to the nearest train station). Quality parts -properly maintained- rarely break. If you want a reliable, durable bike, avoid what we call in the bicycle industry: «stupid light parts». So in most cases, you’re only prevented from continuing your training ride because the mechanical breakdown requires the use of special tools which you aren’t able to carry. Virtually every part on a bike requires a unique tool. For example, cranksets require an 8 or 10mm allen key to fix and are fairly heavy; spokes require a spoke key; pedals require a 15mm spanner, cassette lockrings require a cassette lockring tool; bottom brackets require their own tools. Unless you are planning to do solo-touring, it’s not practical to carry everything with you to cover all of these contigencies. Fortunately, there is one thing you can do to prevent these parts from loosening… and that’s simply to tighten them up sufficiently in the first place! Then remember to check them periodically.
3. Lubricate (almost) everything! Grease should be applied to ALL fastener threads. Lubricate all other and contact points such as saddle rails, seatpost clamps, seatpost shafts, cleats, etc, with an appropriate lubricant (either oil or grease depending on the application). Obviously don’t lubricate anything that could cause you to lose control of the bike (for example: where the stem touches the handlebars and steerer tube)
4. Become an €œinstant fixer€. When you’ve locate the source of a problem, don€™t procrastinate by delaying bicycle repairs. Fix it as soon as you can and it will never bother you again. Then there’ll be one less thing to go wrong in future.
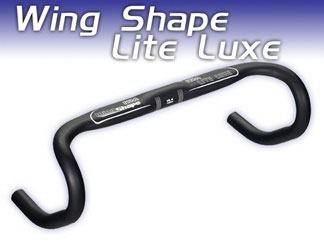
5. Wrap your bar tape well. Wrap the bar tape tightly around the handlebars. Don’t use less than 3mm overlap on the outside radius of bends otherwise the handlebar underneath will begin to show after some use. The 6″ pieces of sticky tape that come with all cork tape kits are the most useless things to reside on planet Earth -they don’t stretch enough, they don’t stick and they’re not long enough either. Sometimes they’ll unravel as soon as your back is turned. If you decide to use these anyway because they look nice, know that the cork tape is practically guaranteed to unwrap as soon as your handlebars get wet (with sweat or rain). If you’re smart, follow this advice: you’re a hundred times better off throwing the stock tape in the bin & using PVC electrical tape in their place. If you really want to make the bar tape secure, get the 1/2″ wide PVC tape, and wrap it around 3 or 4 times the bars. Two wraps is not really sufficient; 5 or more wraps and the tape will bulge and look funny. If you have a mountain bike, the oldest trick in the book is to spray some hair spray inside the handlebar grips; you’ll find they’re much easier to slide on & they stay put once the ‘glue’ dries. [Read more →]
Tags: Learning Curve by Dr. Leslie Brown
No Comments »


