How to patch an inner tube the right way.

The definitive guide to repairing a bicycle inner tube with a patch kit.A lot of people don’t patch bicycle inner tubes anymore, which I think is a little bit sad. Generally speaking, it’s better for the environment to repair rather than replace, so that’s reason enough for me to continue patching tubes. I am sure that the sale of a small patch kit along with extra patches more than offsets the environmental cost of yet another replacement innertube.

I have a strong hunch that most people who buy new tubes all the time do so partly because they don’t know the correct procedure to use when patching an innertube. Maybe what happened was that like me they tried to repair a tube when they were a kid & failed miserably. I’ll admit that despite 10 years of biking experience, I never really bothered with patching tubes until fairly recently either. It’s not that I lack time – it’s that they’ve never worked for me in the past, because no one taught me the proper technique. I have had limited success with glueless patches (park ones are the best by the way). But if you follow this detailed guide, you can repair your punctured bicycle tubes the old fashioned way (using glue and patches) so they behave just like new.

Before I get started, why did I suddenly become converted? Well, what happened was, I got one of my hire bikes back, and to my surprise, one of my clients had patched one of my butyl inner tubes that had punctured. It was the most amazing patch-job I’d ever seen! The edges of the patch were *completely* flat. This one paticular cyclist had reached what I’d call «punture repair perfection». It was even better than those glueless patches I tell you. So ever since then, I reaslied it could work. After a fair amount of trial and error, I eventually found the right way to repair tubes using the traditional glue & patch method – I’m convinced that nothing beats it. [Read more →]
Finding a bicycle that fits & the «ideal position».

Determining your ideal fit on a bicycle.Finding a good position on a bicycle is not an exact science because there is no one standard sized frame, body shape or «ideal position». Different frames having the same seat tube length will have different top tube lengths. Look around and you will see that some manufacturers are reknowned for this. I still haven’t figured it out. It doesn’t help that some frames are measured differently. Have a look at the recent article I wrote concerning measuring bicycle frame sizes.

I’ve ridden quite a few bikes now, in many sizes. I’ve also been lucky enough to supply rental bikes here in Tenerife for hundreds of experienced cyclists ranging in height from 152cm to 203cm (5’1″ – 6″8″). I’ve listened to their feedback regarding how they felt about the way their bike fit. For me, you can only determine your unique «100% fit» by gaining your own experience about bikes that have fitted well in the past – this is a skill which can only be learned with time.

The best way is simply to ride as many different bikes, saddles, stems, handlebars and pedals as you can. Start with a bike you think will fit best and then alter the saddle and stem positions until you find what works best for you. Also try different bikes in a range of incremental sizes if you can. I have the view that obtaining your ideal bike is basically a process of trial and error. My first bike fit relatively well. I learned a lot of things about my subsequent bikes. Now I know that my «ideal frame size» is 56cm. I can ride a 55 or 57cm bike but they feel slightly too small or too big for me. This «ideal frame measurement» as I like to call it has taken years to determine, and will probably change a little as I got older (and shorter!).

I’m probably in the minority here, but in my humble opinion, fitting services (including stationary fitting machines) aren’t ideal either as they don’t give you a feel of how it feels to actually ride that particular sized bike that they are suggesting for 5 or more hours. For instance, a 140mm stem might be what you require on paper & it might even feel great on a stationary bike. Ride it, and you’ll soon discover the extreme difference it makes to the handling compared with a 120mm stem.

I’m a big believer in finding proportional length cranks, stems, wheels, etc. Unfortunately, people are STRONGLY biased in favour of 700c wheels. For small riders, 650c is a better choice, if only because of the toe-overlapping-the-front-wheel issue. If someone doesn’t agree, they’re most likely taller than 5’6″ (I am 5’11»). [Read more →]

Riding steep streets on a bicycle:

Street warning sign - Slope with a 30 % Gradient!I recently wrote an article about the steepest street in the world, Calle Monroy. So after diligently studying the countour maps provided by Google Maps, I decided to take a look for myself, IN PERSON (no one ever does that these days!) I wanted to observe the entire street to judge it for myself, compare it with the other steep streets in the region, and of course take some photos.

I’d previously explored this region in 2006 and came across a sign which warned of a 30% grade! Despite the maze-like network of tiny roads and streets, I managed to find the same sign again; it appears at the top of the adjacent steet, «La Calzada». The top section of this street is so incredibly steep that concrete is used to seal this road instead of bitumen or tarmac. Note that there are grooves moulded into the concrete in a chevron pattern to aid in the traction of vehicles going up or down this terrible slope.

La Calzada, a very steep road with a 30% percent grade.I’ll confess that I did not even attempt to climb this street. I know it is well beyond my current capability. Not only that, but it can be dangerous: if you fail an attempt, you will inevitably fall of and slide backwards down the incredibly steep slope… it’s hard enough to stop with good brakes as it is. On the opposite side of the road, a small shrine stands as a rememberance to someone who died here. So I decided wisely to approach it from the top and decend the whole length of Monroy St instead. Even so, I have thoughtfully provided some free advice for tackling hills with 20%, 30% and even 40% gradients (see below). [Read more →]

Traditional toe-clips and straps vs clipless pedals.

The oiginal pedal-powered hybrid vehicleI’ve noticed that some cyclists seem to have an aversion to using clipless pedals. Actually I’d call it more like a fear of being clamped to the pedals. Maybe, like me, they tried a cheap set that initially came with their bike & nearly killed themselves. I urge you to try as many different pedal systems as you can. They’re definitely not all the same. Personally, my favourite pedals (for walking around in) are called Time atac. For road use, I’ve really come to like Speedplay.

Yes it’s true that sometimes I just get plain lazy. If I need to go down to do some errands, I just jump on one of my bikes that’s equipped with normal pedals & head straight out the door without the need for changing into my cycling shoes. And if I don’t change my shoes, I never change into my cycling clothes either. But I notice that whenever I do that and ride a bike with trainers & normal flat pedals, I actually feel less secure. Normally what happens is that on the back & up pedal stroke, my foot forgets that it’s free & promptly launches off the surface of the pedal. Also, the inevitable climb back to my house is much more difficult + slower. So far from saving time by not changing, I probably lose time riding the actual bike.

Whenever I go for a decent ride however, I don’t even think twice about using the proper equipment. If you’ve tried clipless pedals before & just can’t seem to cope with the fear, I highly highly highly reccommend powergrips. They’re much easier to enter & exit than traditional toe-clips & straps, and they offer a wide band of support.

«Bombproof reliable» bicycle maintenance, part II: The drivetrain.

Simple bicycle drivetrain maintenanceI have come to learn a lot about providing a reliable bike hire service here in Tenerife. Most cyclists rent our bikes from 5 to 7 days and cycle an average of 300-500km or more. In that time, the riders make at least one ascent up to the base of Mt Teide. It’s not uncommon for clients to climb a cumulative total of 10,000 vertical metres!

I’m not 100% convinced that they check the bike over during the time that they’ve rented it either. Needless to say, these pro hire bikes have a very hard life indeed. However, contrary to what you might think, we rarely see genuine mechanical breakdowns. The secret is that our bikes are regularly serviced -every single week- after every single use.

So welcome to Part II of how to make a «bombproof reliable» bike. Here I’m going to share with you some easy ways to achieve that smooth-running, ultra-reliable drivetrain. Part I: Wheels & Tyres can be viewed here.

  1. Regularly clean your drivetrain! The chain and sprockets are the heart of a bicycle’s drivetrain. They are also the first parts to wear out. They’re not cheap to replace- so it pays to look after these parts. You’ll get the most life out of your drivetrain if you periodically clean the chain, chainrings and cassette.
    • There’s no need to invest in special «chain cleaning devices»; in my opinion, they’re not terribly effective, and the mess they remove from your chain tends to leak out and make a mess out of the rest of your bike. If you use the reccommended special degreasers, they’re not particular cheap chain cleaning solutions either.
    • Instead, simply clean the chain and the rear cogs with a rag. The best method is to first rub the lower part of the chain backwards and forwards. When that is clean, move on to the next section. Wipe around the chainrings on the crankset. Then use the rag to clean between the cogs on the rear cluster, as that’s where most of the residue ends up. Also clean the little pulley wheels on the rear derailleur. The last step is to apply a few drops of light or oil or wax-based lubricant.
    • By far the best guide to bicycle chain maintenance can be found on the KMC website. Follow their advice to the letter!
    • Of course, if you find all of this to be a major chore, you might like to have a look at this nifty invention: «The Scottoiler Cycle Oiler dramatically improves the service-life, efficiency and cleanliness of bicycle transmission.» It was first devised as an automatic chain lubrication system for motorcyles and has since become extremely popular with motorbike riders. It sparingly applies a liquid-based oil at regular intervals, and hence the chain doesn’t get so dirty. [Read more →]

Measuring bicycle frame sizes / bike fitting.

How to measure a bike frame.How to measure a bike frame:

Bicycles are measured in several different ways. The usual sizing measurement relates to the seat tube length, given in centimetres for road bikes and inches for mountain bikes. The best way to measure the seat tube is from the centre of the bottom bracket shell to the centre of the top tube. Centre to top seat-tube measurements are often quoted (like in the diagram shown here), but in my opinion they aren’t as useful as centre-centre measurements because they often overestimate the size of the frame. This is especially the case with modern frames which now utilise top tubes with humongous outer diameters.

compact-bike-frame-measurement-medium.gifUnfortunately, with the advent of compact sizing, sizing has become even more difficult. As you can probably tell, I’m not a big fan of compact geometry bikes. The main reason for their introduction by the Giant bicycle corporation was to reduce the number of frame moulds required for the construction of their new composite bikes. Increasing frame stiffness, reducing frame weight and improving fit certainly weren’t the first considerations when the idea of compact frame sizing was conceived. I’ve come to loathe them even more when people don’t know how to quote their effective top tube & seat tube lengths. [Read more →]

10 Quick tips to make a «bombproof reliable» bike. Part I: Wheels & Tyres

Nuke proof “bombshell” rear hubI thought I would share my knowledge on how to make your bike more reliable, starting with the wheels & tyres. Yes, the most obvious problem encoutered when riding is still the age old flat tyre. While flat tyres can never be completely eliminated, most punctures can be prevented by adhering to the next five guidelines:

  1. Maintaining sufficient air pressure significantly reduces the chances of pinch flats (the most common type of puncture). For a 23c tyre, you need to pump up the pressure to at least 100psi (7 bars), or more if you’re a heavy rider. Rear tyres carry more weight than front tyres, so you should preferably inflate these a little more than the front tyre
  2. Use premium-quality rim tape, which stops tubes from chafing against the spoke holes in the rim. I use cloth tape, similar to that made by Zéfal.
  3. Don’t skimp and save on your tyres! Cheap tyres are just not worth it – they’ll be cut to shreds long before the tread wears out. Really good tyres provide an enhanced level of flat protection in the form of a higher density casing & puncture resistant aramid belts. [Read more →]

Spoiled for choice: bicycle disc brakes rotors available in five sizes: 5.5″, 6″, 7″, 8″ & 9″

Little known consequences of a brake failure.

If you have a bicycle with disc brakes, you’ll soon find there are many possible choices for the rotor sizes. From a tiny 5″ all the way to a whopping 9″! The next time you need to replace a rotor, consider the following points.

Advantages of bigger disc rotors:

  • Larger disc rotors obviously give much more power than smaller rotors.
  • For the same braking effort, larger rotors will run cooler than smaller rotors, reducing the phenomenon known as brake fade.
  • Larger rotors will last longer than smaller rotors, as there is more metal present in the brake track circumference.
  • In my experience with steep descents here in Tenerife, where brake overheating is a real problem, larger rotors will also improve the wear life of the pads themselves (especially organic pads), as they don’t tend to overheat as much.

Disadvantages of bigger disc rotors:

  • Each time you step up the size of the rotor, you add a considerable amount of rotational weight to your bike.
  • Another down side of big rotors is that they tend to be a bit ‘grabby’ (meaning on-off-on-off braking performance)
  • Contrary to what you might think, large disc brake rotors are more prone to warping than small rotors.
  • The bigger disc rotors are therefore harder to keep centred & hence can become quite noisy even when pedaling along without applying the brakes. [Read more →]

Human asymmetry & bicycle bio-ergonomics. Leg Length Discrepancies.

Lemond LeWedge

These days we have an infatuation with bike components when we should be more concerned about accurate bike fit. If you want the best peformance, you need the right-sized parts; you simply can’t win on a bike that’s the wrong size. But what if one side of your body is different to the other? If your body is not 100% symmetrical, then your bike shouldn’t be either…

[Read more →]

Teaching people how to slow down & use their brakes –

women’s brake shoes

It’s recently become apparant by simple observation (& also looking at brake pad wear patterns) that many cyclists use the wrong braking technique for steep descents (>10%) here in Tenerife. For maximum braking effect when travelling in a straight line, you only really need to use the front brake. Using only the rear brake is a recipe for disaster because the rear wheel will eventually skid and you could possibly lose control -you react by jamming on the front brake as your only last remaining alternative and that’s what gets you into trouble.

  • Don’t be afraid to use the front brake – due to the distribution of weight, it’s by far the most effective of the two brakes.
  • It is best to use the front brake for stopping, and the rear brake for «speed modulation». 
  • Never apruptly apply the front brake while taking a corner, or the front wheel can slide out.
  • The trick is to lean back over the seat as the declining road gets steeper so that you won’t go over the handlebars.
  • With disc brakes, It is said that organic disc brake pads provide better modulation, but their heat tolerance is extremely poor. Sometimes they’re gone within only about 5 downhill rides!!
  • A better alternative which I use exclusively are sintered metallic brake pads. They are harder than organic pads and thus will cause a faster wear rate of the disc rotor, but that’s the price you pay for improved braking performance! They are also no more expensive than regular organic pads. Using these, you can descend 2km of 10-20% slopes with 6″ discs and not have to worry about brake pad life or overheating problems.

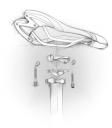
How to correctly adjust your saddle.

How to correctly adjust your bicycle saddle.

I see some people returning our rental bikes with the saddles tilted in the most awkward-looking positions, so I thought I’d begin to offer some free & simple fitting advice for men:

  1. Start with the saddle completely level. Obviously the bike must be on level ground and finding such a place is not that easy in Tenerife - so it’s best done on a level floor.
  2. Forget any fancy invention you may have seen to measure saddle tilt and just eyeball the adustment.
  3. If you get pain or numbness in the front side of your groin, rather than lowering the nose of the saddle, raise the nose of the saddle slightly. This may seem counter-intuitive at first, but what it does is to move your weight backwards, thereby easing pressure in the front region.
  4. If you begin to slide off the back of the saddle or it feels like there is no support, only then lower the nose of the saddle.
  5. Also, start with the saddle clamped in the middle of the rails. Don’t attempt to fit a bike that is not your ideal size by making up for the difference here. Too far forward or backward can lead to knee problems, etc.
  6. When the cranks are level, the ideal position for the seat is when the front part of your knee lines up with the pedal spindle axle.

«To stretch or not to stretch», that is the question.

cheetah-stretch-preventing-injury.jpg

Stretching is a natural activity often performed without thinking by most people and many animals. We’ve all heard of the purported benefits of a stretching regime before and after exercise. Like all health advice these days, there is now contradictory data as to whether stretching is beneficial in preventing injuries. While some studies suggest that there is no benefit to stretching, other studies have suggested that stretching actually increases muscles’ susceptibility to injury. They claim that by stretching, our muscle fibers are lengthened and destabilized, making them less prepared for the strain placed upon them by exercise.

Is it best to stretch before and/or after exercise? Should you even bother stretching at all? Personally, I’m with evolution on this one. You would think there would be some evolutionary benefit: injured animals are far less likely to survive and breed than healthy injury-free animals. We’ve all seen the classic feline stretch. And what better example than the cheetah? The magnificent cheetah is the fastest of all land animals; it has the ability to accelerate from 0 to 110 kilometres per hour (70 mph) in three seconds – faster than most supercars.

(this must be the 1st video not to show a kill)

[Read more →]

Time management & bike riding motivation: maximise exercise benifits of your Cycle Training regime

Time management & organisation

  1. Head for the hills – there’s no cheating yourself here, because you can’t draft behind other riders, and it forces you to keep pedalling continuously. This is our philosophy.
  2. Get your cycling equipment ready the night before – so you have no excuses in the morning not to go. That way, you feel extra guilty if you sleep in, and you won’t miss all-important weekend training sessions due to «general morning laziness».
  3. Become an «instant fixer» – don’t procrastinate & delay any bicycle repairs. Fix it ASAP, because a broken bike gives you one more reason not to go for the next ride.
  4. Increase your mileage to improve endurance – for example: rather than go for daily 1 hour rides, go for a 2 hour ride every other day, or 3 – 4 hour ride twice a week. This also eliminates a lot of wasted preparation time.
  5. Get out quick before you change your mind – clouds looming overhead? Computer not working? Cycling jersey still in the wash? Pacing & wondering whether to go or not? If so, you’re procrastinating. Don’t think, act! Just go already, even if the conditions aren’t ideal! Even if it rains, once you’re wet, you can’t get any wetter. 😉 Provided that your habitual bike position doesn’t change, if you make the time to ride, you will get fitter & you will enjoy cycling more… with plain old tap water or with sports drinks; with or without knowing the distance you’ve travelled or the current speed you’re doing; wet or dry.
  6. Go for a short ride – we all have other important commitments besides cycling. If you don’t have time for a long 3 – 5 hour ride, don’t obsess over not being able to go. I.e. don’t suffer from «all or nothing syndrome». Go for an hour. Go for 20 minutes. Its still better than nothing! If you’re really serious, treat it as a «rest or recovery day».
  7. Ride to work – exercise while you commute. Also great for the environment; no further explanation necessary.
  8. Join a bike club – the commitment to meet with other cyclists at a specified time and date helps your motivation level. You’re less likely to bail out of a training session, because you let other people down as well as yourself.
  9. Don’t set unrealistic goals – because when you fail to reach them, you’ll lose motivation to continue with your training plan. Don’t be too hard on yourself if you skip a day or a week or even a month. Even professional cyclists need rest periods. And lastly, remember that half the fun of excercising is feeling the gradual improvement in your own fitness level. If you haven’t ridden for a looong time, there’s only one way to go, and that’s to be fitter. Maintain positive thinking.
  10. Don’t be a slave; embrace change! – this applies to heart rate monitors, cycle-computers, training schedules, ride routines, clothing, food, etc. We’re all humans, we’re all fallible. All routines eventually become boring and «samey», and then they fail. Hence change is the key. Plan a new ride once in a while.

«Ride your bike. Ride your bike. Ride Your bike.» – Fausto Copi